The hardest thing in makeup is to get your base right. You need to find the good level of coverage, the right finish, the right tone and undertone and make sure your skin doesn't get any adverse reaction. Even though I have a ridiculously big make up collection, I do try not to accumulate too much foundations and I'm often on a challenge to finish a particular foundation.
For years I've been mistakenly "accused" of having a pink undertone, because my face has quite a lot of redness. A bit over a year ago, I realized that my skin was in fact neutral leaning on yellow and some of my favorite foundations had the wrong undertone. Always match your foundation with your chest and neck.
To understand how to neutralize something, you need to know about color theory. To opposite colors on the color wheel cancel each other. Therefor, to remove the redpigment from a foundation, you need to neutralize it withgreen. If you need your foundation to be yellow, you need to first use some green adjuster and then add some yellow. Various professional brands offer color adjusters that you can mix with your foundation.
Because I'm not a professional make up artist and that I don't have that many pink foundation left, I decided to neutralize my foundation with a green primer and then finish it with a yellow finishing powder. If you have strong yellow undertone though, buying adjusters might be a good investment. Women with fair skin tend to have less strong undertones.
The too pink foundation (It's a light coverage foundation, but trust me it's pink!)
adjusted version on the left, untouched on the right
As you can see, mixing the foundation with green turns it into a neutral shade.
I previously review OCC lip tar in Queen previously and everything I said for this lipstick is applicable for this shade too. It is insanely pigmented, ultra long wearing (a solid 8 hours on me) and BRIGHT! This shade is a neon fushia pink that is rightfully named anime. Out of the two lip tars, this shade favorite, it is actually my favorite bright lipstick period. I wore this in France last weekend and I got a lot of looks. This is definitely a shade that you need to wear with confidence.
You can get this at several online retailer and at Sephora US and Canada.
I'm not somebody who uses primers on a regular basis. My skin is quite dry and my pores are normal size and I don't see the necessity. I also need quite a solid medium coverage and I try to not layer too much. I already have quite an intricate skin care routine!
I do however love a nice healthy glow, so when I had the occasion to exchange my sephora points for a deluxe sample I was trilled! Laura Mercier is all about the skin and she has a very good selection of primers. She has two radiance primer, a pinkish shade and this bronze shade.
The first time I applied the radiance bronze I was chocked in a good way by the pigmentation. I don't think this particular shade was intended for really pale ladies like me. (I'm around an NC15) Now I mix it with my foundation and it warms up nicely the shade and gives a really nice glow.
bare faced
With my foundation mixed with the primer
Overall, I really like this primer. It's a very nice creamy texture that doesn't feel at all like silicone. It can be used under, mixed or over foundation. I do find the price in Belgium outrageous compared to the United States though. I might purchase it when I run out, but not at over 40 euros!
I don't think I ever posted a personal post before, but I think this is an issue that touches a lot of people and I think sharing makes it easier.
I've always struggled with my weight. I was a big baby who was constantly hungry. As a kid I was always the tallest one of my class till 6th grade and I was always hungry. I'm actually not that tall (1m74 or 5'8 1/2), but I did grow up faster than most kids and developed puberty younger than most girls. I'm an emotional eater.
My parents divorced when I was 8 and I kept on eating. One year later my Father left to live one year in France, I missed my dad a lot and kept on eating. Then I went to visit him and he was chocked by my weight and controlled my food. I lost around 10 pounds which is a lot for a 10 years old. Almost a year later my maternal Grandmother died of unnatural causes and I took the weight back and then some!
In my teens I lost and gained back some weight at least 3 times. I actually never knew life without the yo-yo effect. At 17 years old, I left my small town to move to Montreal for my school. I decided to lose weight and I kept it low (with a lot of variations of course) till I was around 23 years old.
At 21 years old in a shitty pub
When I was around 25 I started to gain dangerously weight, plummeting to a size 20 (22UK 50 in EU). I lost back some weight two years later and kept it stable at a size 16 till recently.
At my biggest ever at 26 years old
In November I decided to resume my weight lost and come back to a healthy weight. I lost 30 pounds (13,6 kilos) so far.
Realizations
To end up on a positive note here are some realizations that are currently helping me to carry-on smoothly with the weight loss:
Exercise is good but doesn't make you loose weight. Your body as a tendency to compensate by spending less energy the rest of the day and making you hungry. I lost weight many many times, but never significantly by going to the gym.
Diets do not work. Counting calories isn't sustainable and the weight always creeps back up. You can't succeed by being constantly hungry.
If you do not loose weight one week it might be water retention, but it certainly isn't muscle gain! You do not gain a pound of muscle in a week!
The low fat high carb approach doesn't works for me. I need fat in order to feel full and not overeat. I'm now on a ketogenic lifestyle (similar to paleo) and it is so much easier to lose weight.
If you are also struggling with your weight (under or over) and feel like sharing your story, I would love to hear it!
When it comes to mac, I always had a tendency to stick to their eyeshadows and lipglosses. I know that about 90% of beauty bloggers seem to prefer lipsticks over lipglosses, but I personally prefer the glosses. However, when I want to go for a smokey eye, I prefer something a little more low profile on my lips.
Creme cup is part of the cremesheen finish from mac, which is essentially a satin finish. The shade is a milky nude pink that will look more pink or more beige depending on you lips. It has the classic vanilla sent from mac, but the sent isn't overwhelming. On me, it looks like a pale soft pink. It is quite similar in shade to the infamous Angel, the favorite shade of Kim Kardashian
The bump on my lips is a scar, I had 9 stitches in my bottom lip if anybody is wondering
The staying powder of this lipstick is quite average, I would say about 3 hours, which is common with pale shades. I does end up having the white ring inside your lips. It's definitely a shade you need to touch up every few hours. I don't think the formula is at fault for this, it's just the nature of pale shades.
Allergie season can you tell?
Overall, I'm really please with this lipstick, the shade is very pretty and it feels great on the lips. It's the type of shade that will remind you that you need a teeth bleaching because of the mauve undertone. Like with other lipsticks from mac, I find the texture perfect, it's not too creamy that it has a tendency too fly all over your lips; and not too dry that it looks very dry when you wear it on. I love wearing this with a translucent beige gloss on top.
I'm back after a small hiatus, I decided to stop coffee and the withdrawals symptoms were not pretty! Now that I'm back to my normal self, I will catch up on my reading. I'm looking forward to reading your latest posts.
Those of you who have been reading me for a while, will have noticed that I'm really into pinks and cool toned shades in general. Once in a blue moon I do like to get out of my comfort zone; and the three following products are my favorites in their respective category.
Inglot pearl eyeshadow 407 is one of my favorite shade. If you are a fan of duochromes, this is definitely a nice one and it's very pigmented buttery and smooth. The staying power is also incredible. The pearl finish from Inglot is definitely my favorite one. The shade is a peach with a golden reflection, it looks more gold or more peach depending on the lighting.
I already talked about the Lancôme Blush subtil in Miel glacé. It's a shade that has been discontinued in the European market, but not in North America. Lancôme is not a brand I usually go for, except for mascara. I always associated the brand with ladies in their fifties. I'm happy to say that I was wrong. Their line of blushes is really nice, smooth and easy to blend. They are also easy to build up. This particular shade is a brownish apricot with a satin finish. I like that it's not too bright and it does a great job at hiding my redness on my cheeks and giving me a warm glow.
Left inglot 407, right Lancôme miel glacé
I think that in my collection of 30+ lip products, less than 5 are truly warm toned. This Lipglass from mac in Lychee Luxe is one of them. It's a very nice coral shade with a subtil shimmer. Depending on your lips it will look more orange or more pink. Like the rest of the lipglasses the finish is sticky and it lasts a solid 4 hours.
wearing Lychee .Luxe
As you can see by the look above, all those shades go very well with each other. I'm wearing some bronzer in my eye crease and a bright purple eyeliner in the lower lash line.
I just wanted to announce that I started a new blog in French called Pinceaux et cie. As most of you may know, I'm from Montreal and my first language is French. I also speak German and very basic Dutch.
I'm still adapting to my new Country and I can't say that I have a lot of friends yet, so I spend most of my weekends alone. (My husbands often works on weekends, he works in the shipping industry) Blogging definitely keeps me busy and help me to share my passion with equally passionate people.
I hesitated between just alternating my paragraphs between French and English on my blog, but I decided against it. I find it easier to read in only one language.
The posts will be very similar to the posts here, so you don't need to follow both.
Like most women I’m always running out of time. It takes me
almost 1:30 to get to work and I can use any time saving tricks I can in the
morning. There are some days where you just want to feel a bit more special and
crank up your routine a notch!
Layering serums and moisturizer
This is the only step in all of those steps that I actually
do every day. Actually more than half of my time is dedicated to skin care in
the morning. I let every step sink in before I move on to the next step. If you have dry skin it will make a huge
difference in how your make up applies. If you have oily skin you can replace one of the moisturizer by an oil reducing primer
Exfoliating your lips
I have chronically chapped lips, I kid you not! The problem
with using lip balms is that it just doesn’t get rid of the flakes. It flattens
them down and then they come back in force. A lip scrub will make you look more
polish and make your lips look much better!
Letting the foundation set before you powder
I have to give credit for tip to pixiwoo. Since I started
doing this, I find that I do not need as much powder and that my face looks
much smoother. I do foundation and
concealer first and then I do the eye makeup. I then go pack to powder and blush.
As you can see by the video above, this is a method I took
from Wayne Goss. But basically the method is as follow:
-Apply your lid, crease and brow bone shade.
-Take a clean brush and blend the crease into the lid and brow bone.
-Apply a darker color to the outer part of your eye.
-Blend once more with a clean brush
I find this really does a difference in how my eyeshadow look end up. It looks less muddy than blending everything in the end.
Tight lining
If you can stand it, this is a great way to make your eyelashes look extra full. It's also great for a no-makeup look!
Smudging up that liner on the lower lash line
When I'm in the rush in the morning, I don't go for overly complicated look. But I don't find my eye looks to be completed without putting something on the lower lash line. On most days I just apply softly some dark eyeshadow on the lower lash line. If I want it to stay extra long I usually go for eyeliner then I smudge, then layering some eyeshadow on top, then smudge.
Highlighting the tear duct and cupid ’s bow
Most women highlight the top of the cheek bone when they want to go for the highlighter look. Applying highlighter is in the inner corner makes the eyes look more open and on the cupid's bow makes the lip look fuller. It's also more subtle for day wear
Using a finishing brush
If you are a fan the natural look, then a finishing brush is a must. Once you are done with your face routine, use a clean, ideally flat large brush to smooth out everything and blend out the edges and removing extra powder. I like to use a big fan brush for that. This is what I do to smooth out my blush after taking pictures for my blog. (I always apply blushes heavier than in real life for pictures).
Using a finishing spray
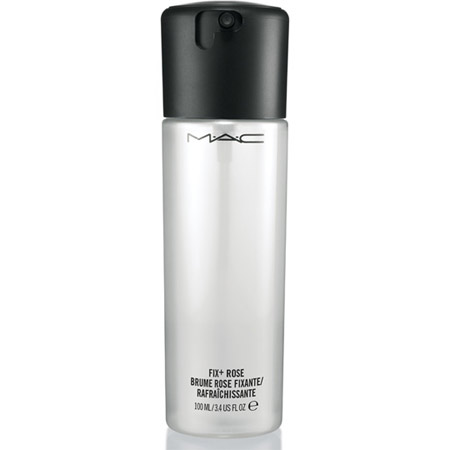
I always though that a finishing spray was rubbish, but now I'm a convert! If you have oily skin (and use a formula aimed at that) it can make your make up last longer. If you have dry skin than it makes the powdery look go away and give you a subtle glow. I personally like Fix + from MAC for the dewy look, it doesn't however make your make up stay longer.
Using a reverse lip liner
This is one of those steps I rarely bother with, but when I go for an extra intense lip, like with a bright OCC lip tar, I always apply reverse lip liner. It makes the lips look more defined and limits feathering. If you don't have one, you can use a creamy concealer around the lips.
I used to not believe in skin care and buy the cheapest good quality product I can find. All I was doing is cleansing and moisturizing, usually with a moisturizer by Avene, La Roche Posay or Vichy.
Lately I started reading the actual science behind skin care and found that once of the most universally loved ingredient, both by research and consumer review, was vitamin C. I started to research a serum that I could use underneath my sunscreen. Vitamin C helps protecting your skin against free radical and improve the efficiency of sunscreen. The thing is, most options out there are at least in the 40 euros range. I also had a couple of moisturizer without sunscreen to finish. This is why I decided to go for the Philosophy Turbo booster C powder which retails for 28 euros in Belgium.
The product comes in a little tinted glass bottle with a little spoon. It is made to be mixed with your serum or moisturizer. I personally like to mix it with a lightweight lotion. Philosophy recommends using half a spoon to a full spoon. Some people are a bit sensitive to the for of vitamin C used and I recommend starting with half a spoon and building it up. What is great about this product is that the form of vitamin C is stabalized and won't loose potency with time.
Active Ingredients
The powder contains the following active ingredients:
- Ascorbic acid and panthenol, both form of vitamin C which are powerful antioxidant and can have a brightening effect on some people
- Zinc PCA, a skin-conditionning agent that can supress collagenase (an exyme that destroys the collagen in the skin). It can also help suppress excess oil
- Argine, an amino acid that has antioxydant properties and can help healing the skin
- Green tea extract another antioxidant
- Aloe an humectant it helps bringing moisture to the skin.
Results
I've been using this powder for over two months and I can definitely see an improvement in my skin. My skin feels also very soft and firm and less dull. I stopped using it on vacation for two weeks and I saw an improvement right away when I used it again.
I know 28 euros might be a lot of money for some of you, but it lasts forever. I'm not even half way through the bottle after using the powder everyday!
Those of you who have been following me for a while, will know that I am a huge Make up for ever fan. Most of what they are offering is really pigmented and long wearing. They also have a lot of fun young colors in the range. Their eyeshadows are available in matte, shimmer, satin and diamond. Today I will be reviewing two of the shades from the diamond range (metallic finish) 311 diamond burgundy and 302 diamond turquoise. I bought them in a refill for 14,90 euros and the eyeshadow contains 2.5g.
311 Diamond burgundy
Even though it is called burgundy, this is really more of a plum shade. It's a shimmery dark reddish plum with small silver glitters. The pigmentation is even and applies very smoothly. I usually use this shade as a crease shade, with a pale beige pink on the lid. I actually bought this one in Canada years ago and it used to be a personal favorite, till I bought star violet from MAC, my favorite reddish plum.
Diamond burgundy is not as shimmery as some other diamond shadow, which makes it wearable to add some dept to a look.
I used it as a smoky eye to show the color better. I paired it with a charcoal color. But like I said I prefer this on my crease and outer V.
302 diamond turquoise
This eyeshadow is definitely less work appropriate than the diamond burgundy, but it's so gorgeous! I like to wear it with warms browns or navy (my favorite combo). If you are a turquoise fan this one is for you! It's a medium blue turquoise with small gold glitter. This one applies also very shimmery and metallic. I hesitated between this one and the infamous 168 which is a bit darker, more pigmented and more green, but I already own a lot of greenish aqua shades, I wanted something that leans more blue.
On this look I applied it wet and paired it with a navy demi-matte shade. I'm wearing sephora flashy liner in flashy blue on the lower lash line layer with the two shadows. I think it's a great eyeshadow for the summer paired with bronzed skin.
Here are the two eyeshadows swatched dry.
I really like those two eyeshadows from make up for ever.If I had to recommend one I would go for the turquoise. I personally find the plum and burgundy options from MAC to be a bit more special. (They do however give you much less for a similar price).
Make up for ever also has some gorgeous greens in the diamond finish if you are into those sort of shades.
As you know, I'm a recent contouring convert. One of the most frustrating things when you have a short face is finding brushes precise enough for the face. I did own the mac 168 brush (which I gave away to my best friend with already amazing cheek bones), but it was simply too big for my face. That's why I was very happy to find out about those two lovely illamasqua brushes.
The Illamasqua brushes are all vegan, synthetic fibers and they look very sleek with their black handle and ferule (both made out of plastic). The fibers are also the softest synthetic brush I own, especially the highlighter brush and I own quite a few by Ecotools, real techniques, elf and the infamous MAC 187. They also have the name of the brushes written in small letters in English and French. Isn't the name "pinceau élévateur" chic or what?
Illamasqua brush up brush
handle and ferule 15 cm, bristles 34mm wide
Illamasqua recommends using this brush with powder brush, but everybody seems to be using this for contour. I quite like this brush, but it's definitely a one trick pony. The bristles are super dense and cut slightly oval, great for a concave surface like the hollows of the cheeks. It works really well for that purpose. I prefer to lay down the color with this brush and blend it with another brush. It works for both powder and cream, but it's easier to work with cream because of the density of the brush.
I have a white cat, can you tell?
This retails for 28,50 pounds, but I got it in a online promotion on Illamasqua website called build your own blusher set. You have the choice between most of their powder blushes and a choice of three of their blush brush for 35 pounds.
The highlighter brush or pinceau éclat
handle and ferule 15cm, head 2 cm at widest point
The highlighter brush is so, so soft. It's a small dense brush with an oval ferule and an oval shape. This brush is very versatile. You can use it to buff in your foundation, with powder and cream highlighter, for contouring, precise application of light pigmentation blushes etc. I prefer the Real techniques contour brush for contouring, because it is less dense. My favorite ways of using this brush is with cream and liquid highlighter and to blend my contour. We often have a collection full of blending brushes for the eyes, but nothing for precise blending on the face. I also used it with cream blush when I was traveling and it was lovely for that as well.
I can not think of any brush on the high street that is a dupe of this brush. It's smaller than the mac 109.
Overall I am super satisfied with my Illamasqua brushes. I was hesitant to pay so much for synthetic bristles, when you can get good brushes from the high street, but those brushes are definitely in a category of their own. The highlighter brush is really a must have for my shorter face shape and the brush up brush is a great and well made novelty brush for the brush lovers out there!